What does it include?
Drawings:
Formations: Drawing Library - use this to create all of the formations for your playbook that is used as the foundation to create your Run Game File Library
Fronts: Drawing Library - use this to create all of the defensive Fronts for your playbook that is used as the foundation to create your Run Game File Library.
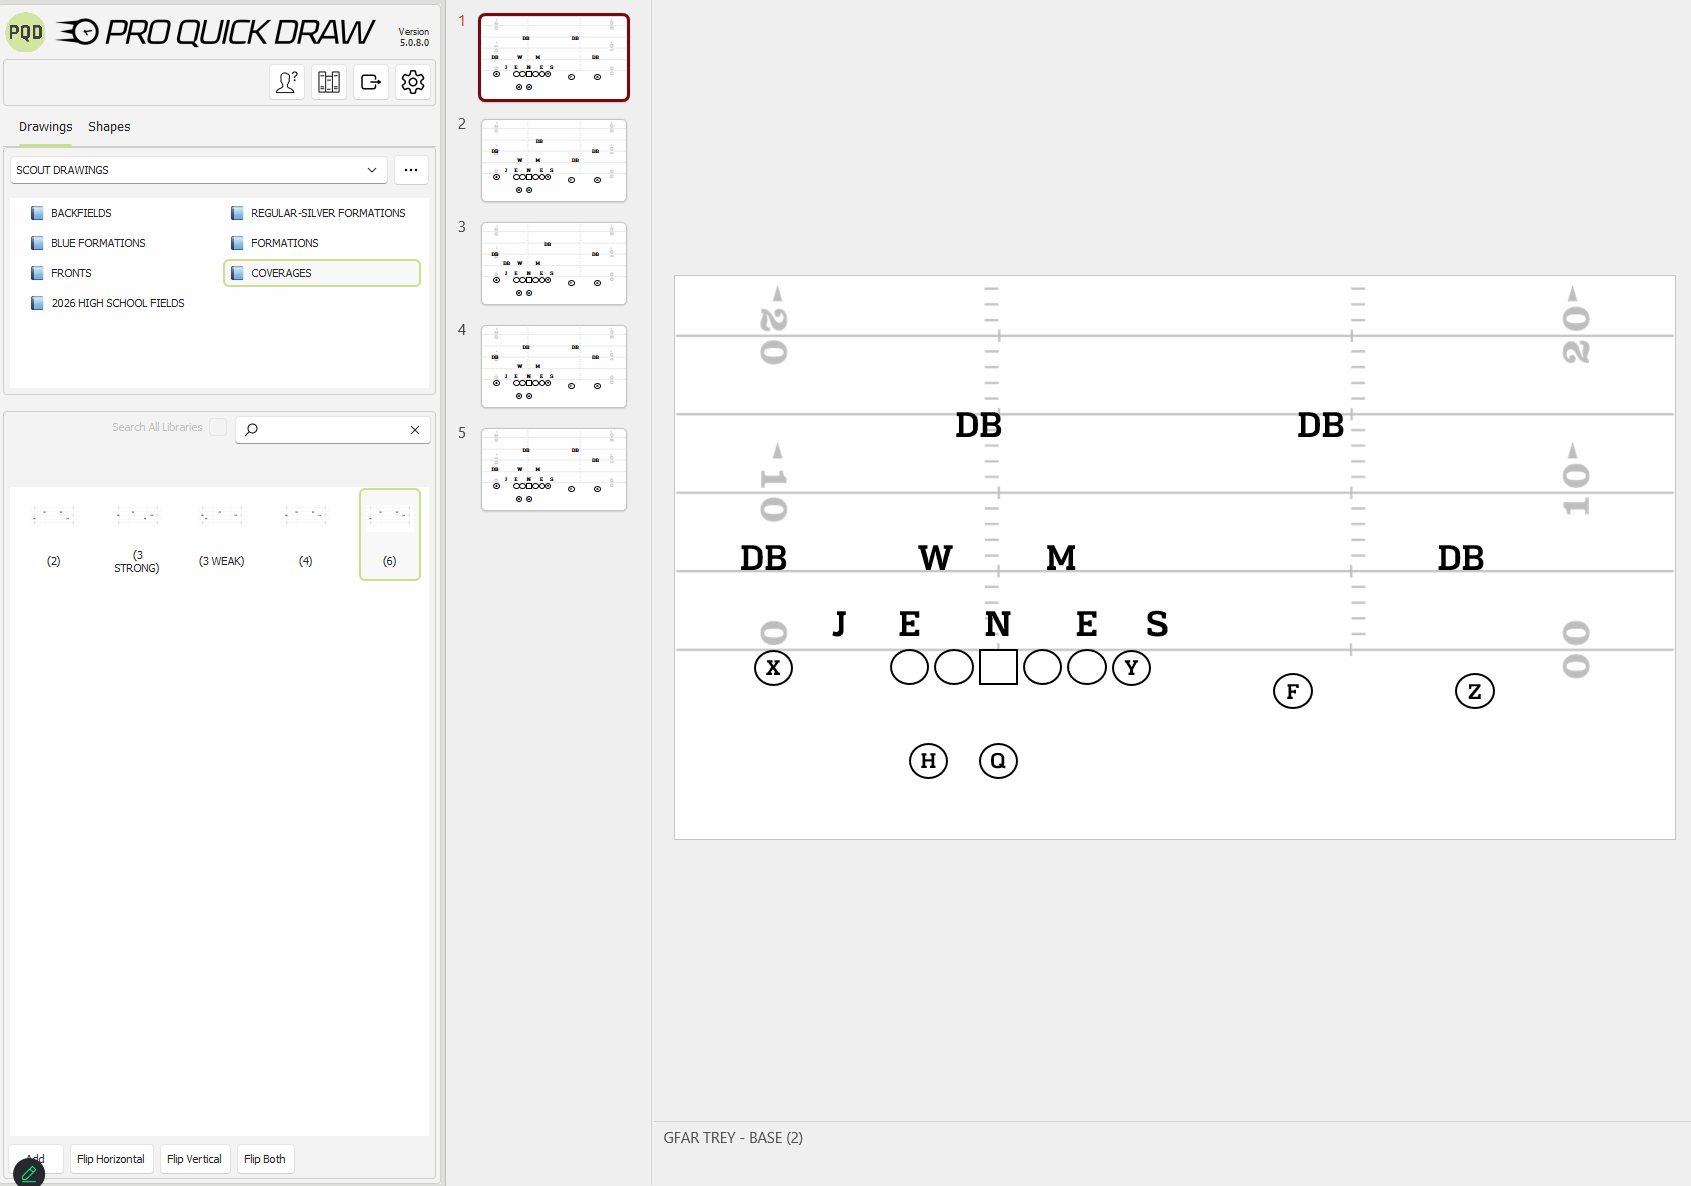
Coverages: Drawing Library - use this to create all of the defensive Coverages for your playbook that is used as the foundation to create your Run Game File Library.
Shapes:
Alignments: Text box when added to a selected player, will display the location of the player on the field. (#-1)
Defensive Paths: Pre-built lines and grouped shapes that enable a coach to add these shapes to a defender and represent their movement. (Use this shape library with the "Ungroup On Add" function, which is discussed further down.)
Scout Blocks (Dots): Pre-built run blocking shapes where the endcap is a dot. This allows a user to easily manipulate the shape to fit it on the diagram exactly where needed. To made an adjustment, add the shapes, right click and select Edit Points to place the block where needed. These are single line or single freeform objects.
Scout Blocks: Pre-built run blocking shapes where the endcap is a flat line shape. (Do not adjust the size of the endcap.) RIGHT CLICK ON BLOCKS, SELECT SETTINGS, SELECT UNGROUP ON ADD. This will enable to you made adjustments more easily. These are grouped objects with the endcap. PowerPoint does not offer a line endcap so we have modified lines & shapes in order to accomplish this look.
Zone Scheme: Blocking shapes that have been created to be used when drawing a zone blocking scheme. This includes double teams and lines to represent blocking to the 2nd level.
Gap Scheme: Blocking shapes that have been created to be used when drawing a gap blocking scheme. This includes double teams and lines to represent blocking to the 2nd level.
The PQD Block libraries and shapes are built from a Field to Boundary perspective. The drawings are built to where the ball is on the left hash and the field is to the right. The blocks are built to where the run scheme is going towards the field, or to the right if the ball is MOF. If you add a drawing and flip it to where the ball is on the right hash, the blocks will also need to be flipped to match this concept. Best practice is to draw from field to boundary, if the ball is in the middle, draw from right to left.
.png?width=655&height=369&name=image%20(5).png)
Motions: Pre-built lines when added to a selected player will show the pre-snap movement
QB Paths: Pre-built lines to show the path of a QB
RB Paths: Pre-built lines to show the path of a RB
Routes-Name: Pre-built lines with a route concept that will drop below the selected player when added. (Open the Routes-Name file and open the selection pane within the arrange button to edit the name of the routes and change them to your terminology.
Routes: Pre-built lines that will drop on a selected player
The PQD Route libraries and shapes are built from a Field to Boundary perspective. The drawings are built to where the ball is on the left hash and the field is to the right. The routes are built to where in-breaking routes go to the left, and out-breaking routes go to the right. If you set your drawings in the middle of the field this principle still applies. If you add a drawing and flip it to where the ball is on the right hash, the routes will also need to be flipped to match this concept. Best practice is to draw from field to boundary, if the ball is in the middle, draw from right to left.
Shades: Shapes used to identify defensive front alignment. Select the offensive player and then add the shape.
Stock Lines: Pre-built lines & freeform objects that will allow a coach to select the object and begin drawing with a default line/shape. (Solid/Dashed lines, dots, ovals, arrows)
How does it work?
- After the Scout Cards Install Package has been installed, go to the Settings Icon within the Play Editor Menu
- Within preferences, enable the Auto Name Plays function and set the format as:
{1} - {2} {3}
Example: Truck - Over (4)
This will name the files in the notes section as you build your diagram using the drawing libraries for Formation, Fronts, Coverages. - You have the option to Always Overwrite Background. When adding a drawing the background will be replaced with the background in the drawing. If unchecked, this will default to the current slide background.
- Always Open Play Editor: Enable this to always open the play editor menu when you use PowerPoint.
- Within preferences, enable the Auto Name Plays function and set the format as:
- Within the drawing section, click the 3 dots to the right
- Reorganize the Drawing files in the order that fits your drawing preferences by dragging and dropping.
- We suggestion 1) Formations; 2) Fronts; 3) Coverages
- Add existing Drawing libraries here as well by clicking Add Drawing Library.
- Once completed select OK.
- Reorganize the Drawing files in the order that fits your drawing preferences by dragging and dropping.
- Right Click "Formations" and select Settings
- On Add Drawing: Select Add to New Slide. Each time you select a drawing it will create a new slide
- Order: Default
- Click OK and close
- Right Click "Formations" and select Edit Library
- Edit the style of your drawing: Change the player fill colors, font, DO NOT CHANGE THE SIZE OF THE PLAYERS
- Align the players on the screen to create your first formation
- Name your formation at the bottom of the screen within the Notes section
If you do not see this section, click on the "Notes" button at the bottom of the PowerPoint Screen - Once your first formation is completed, right click on the thumbnail of the slide in the menu on the left and select Duplicate Slide. You can also do this using the shortcut "Ctrl+D" after selecting the slide thumbnail.
- Create the rest of your formations.
- Once completed, save the file and close.
- Right click on Formations and Select Reload Library
- Right Click Fronts and select Edit Library
- Edit the style of your drawing: Change the player text colors, font, DO NOT CHANGE THE SIZE OF THE PLAYERS
- Align the players on the screen to create your first front
- Name your front at the bottom of the screen within the Notes section
If you do not see this section, click on the "Notes" button at the bottom of the PowerPoint Screen - Once your first front is completed, right click on the thumbnail of the slide in the menu on the left and select Duplicate Slide. You can also do this using the shortcut "Ctrl+D" after selecting the slide thumbnail
- Create the rest of your Fronts.
- REMOVE THE OFFENSIVE LINE FROM ALL OF THE DRAWINGS. Only the defensive players and shades (if added) should remain.
- Once completed, save the file and close.
- Right click on Fronts and Select Reload Library
- Right click on Coverages and select Edit Library
- Edit the style of your drawing to match the fronts: Change the player text colors, font, DO NOT CHANGE THE SIZE OF THE PLAYERS
- We have given you Cover 2, 4, 6, 3 Strong & 3 Weak. Rename these coverages in the notes section to match your terminology. If you want more, recreate new coverages using the instructions above.
- Once completed, save the file and close.
- Right click on Coverages and Reload Library
- Delete slide 1, and select click to add first slide. This is important to get your auto enable settings to take affect.
- Add a formation drawing from the button menu by either selecting the drawing and clicking add, or double-click. (If you want to flip the drawing, you can click Flip Horizontal/Vertical/Both.
- Add a front drawing
- Add a coverage drawing
- After adding your drawings, select Shapes at the top of the menu and select Scout Card Shapes
- Within the shapes section, click the 3 dots to the right
- Reorganize the Shape files in the order that fits your drawing preferences by dragging and dropping.
- Add existing shape libraries here as well by clicking Add Shape Library.
- Once completed select OK.
- Select a player. Select a shape library such as Blocks and add that shape to the player.
- Add a shape from the button menu by either selecting the shape and clicking add, or double-click. (If you want to flip the shape, you can click Flip Horizontal/Vertical/Both.
- Using the drawings and shapes to create your first run diagram, you now want to name your play in the Notes section at the bottom of the screen. If done properly, your formation, front & coverage should already be within the notes.
- Make sure to use CAPS ON to create a clean play database.
- Build multiple slides with all of the content and use the Export button within the Play Editor Menu to save these files in the correct destination all at once.
- Click the Export button at the top of the play editor menu to export all of the slides to create individual files for each slide and have them saved in your PQD Playbook Master Library
- Export Folder: Click the 3 dots to the right to select your destination for your individual files
- Page Export: Click File for each slide
- File Type: PowerPoint
- Export Range: All or a specific range of slides
- Slide Notes Text for Name: Enable this feature to use the notes at the bottom of each slide to create the file name for each slide.
- Prefix Slide No: This will add a slide position prior to the file name
Best Practices:
Build every Formation vs. Each Front/Coverage to build a card library.
- Build your Formations Drawing Library first.
- Build your Fronts Drawing Library second.
- Build your Coverages Drawing Library third.
- Add a Formation
- Add a Front, and duplicate that slide as many times as needed depending on how many COVERAGE variations you have.
- If your library contains 5 coverages, duplicate slide 1, 4x to create 5 total slides.
- Add a coverage to each slide to build 5 total cards.
- Export all of those drawings to a Scout Card Folder labeled "Formations vs Defense" and now you have every formation/front/coverage completed.

-
- Export Folder: Click the 3 dots to the right to select your destination for your individual files
- Page Export: Click File for each slide
- File Type: PowerPoint
- Export Range: All or a specific range of slides
- Slide Notes Text for Name: Enable this feature to use the notes at the bottom of each slide to create the file name for each slide.
- Prefix Slide No: This will add a slide position prior to the file nameClick the Export button at the top of the play editor menu to export all of the slides to create individual files for each slide and have them saved in your PQD Playbook Master Library
- We suggest you complete this process with the most frequent formations you see on a yearly basis. By building a large library you will have the majority of the initial work completed before the season starts.